Neon Glow Text Effect using Photoshop

Written by Saran on
July 8, 2014,
Updated
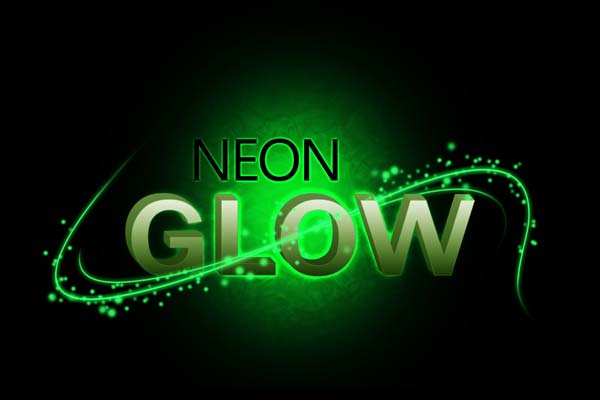
July 10, 2014In this tutorial, I am going to create some sharp-looking neon glow effects on 3D text using a combination of layer styles, the Pen Tool and some filters. Most of this tutorial is done in Photoshop, the 3D letters are created in Illustrator. If you don't have Illustrator, you can also try making 3D letters in Photoshop, I will show you how? The end effect is quite stunning and hopefully you'll pick up some tips and techniques you didn't know before. Lets get start.
Program : Adobe Photoshop CS3 Difficulty : Intermediate Estimated Time : 1 hr. Tutorial Provider :
Vecteezy Final Result :
STEP 1
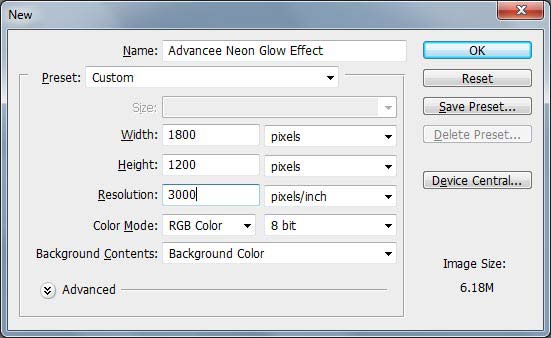
Let's start by creating a new document . Set the dimensions of the canvas to
1800×1200 px. with Black background color (# 000000).
STEP-2 (Create Background)
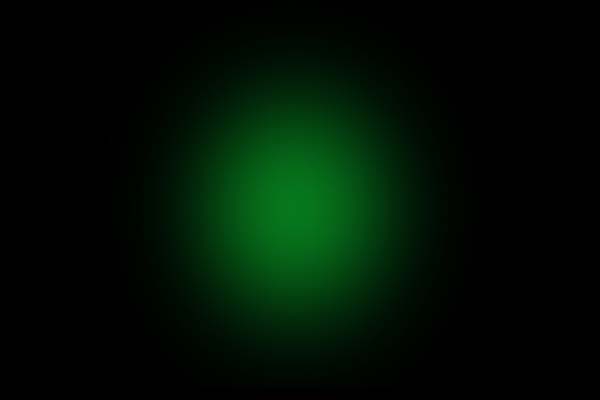
Take a new layer, using
Elliptical Marquee Tool(M) create circular shape in the center of canvas and give Feather radius 100pt.
(Ctrl + Alt D) then fill it with green color(# 089724). It'll look nicer at the end.
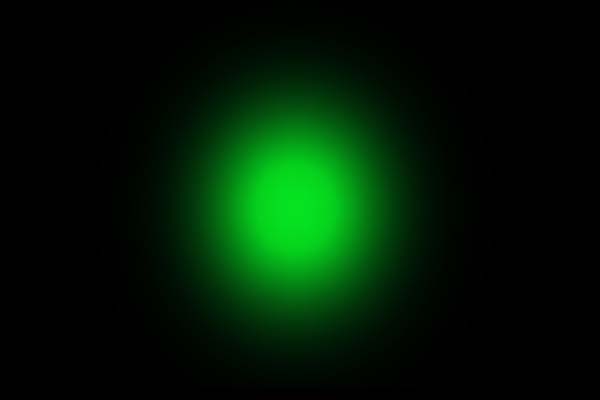
Then duplicate the layer and change the layer mode to
Color Dodge. This will make your light ball a stronger light effect as shown.
Take a new layer, Set the background color to White (# ffffff) Foreground color to Black (# 000000) and make selection around the ball shape by holding Ctrl button click on layers thumbnails. Then create cloud effect go to
Filter > Render > Clouds. 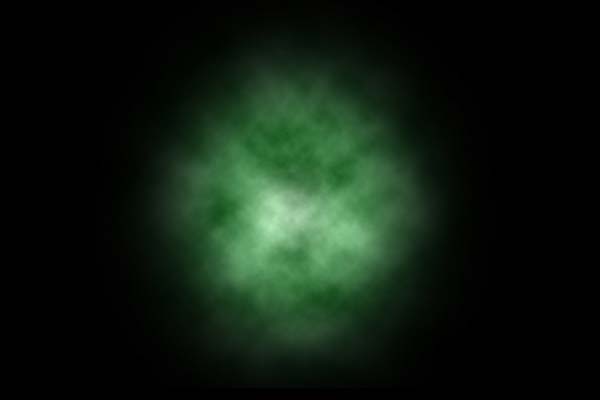
Change the layer mode to
Overlay and change the
Opacity to
35%. Now go to
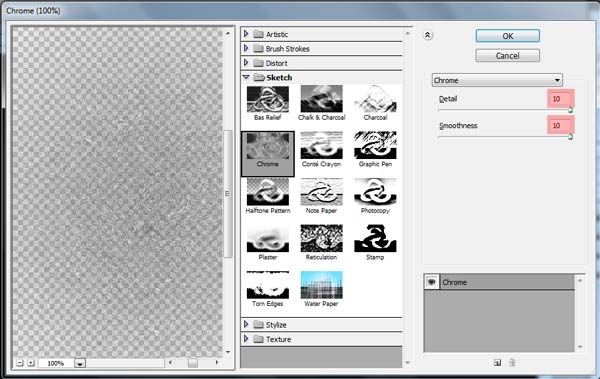
Filter > Sketch > Chrome, change the settings (Detail 10 & Smoothness 10) as shown below and press OK.
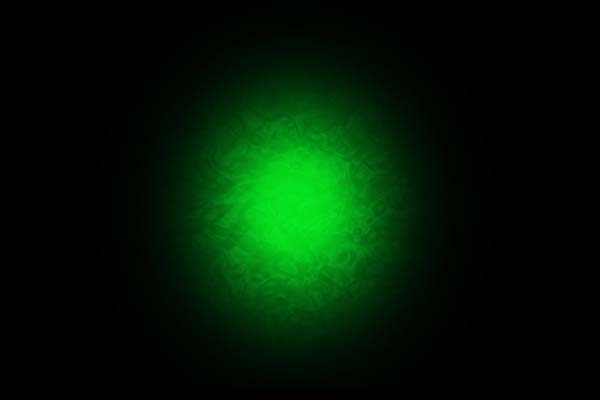
The effect will look like this after adding Chrome.
STEP-3 (Creating text)
Create 2 new layers, using
Horizontal type Tool(T) type NEON in one layer and GLOW in another layer then place them as shown.
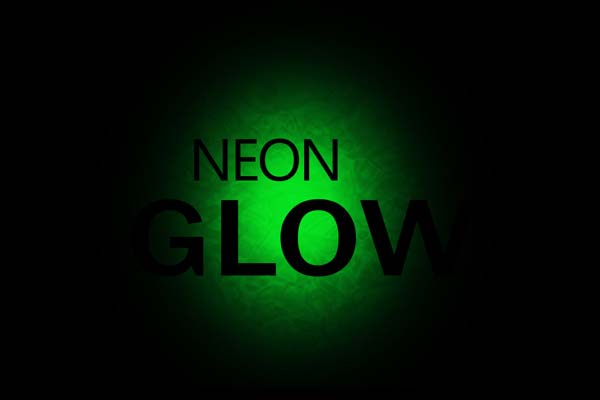
Then double click on NEON Text layer to access the layer style and give
Outer Glow as shown below.
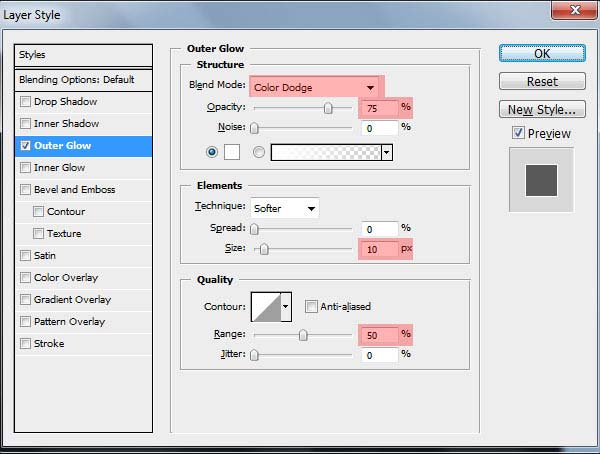
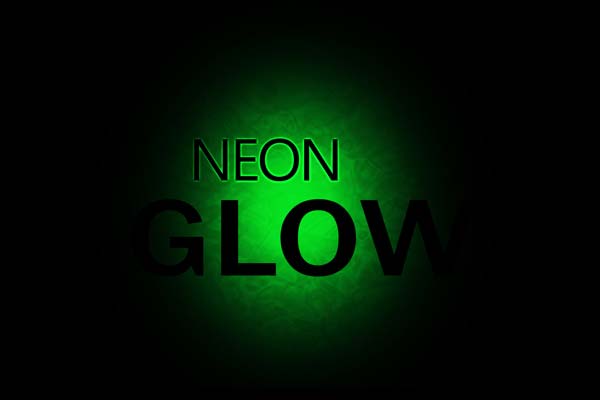
The effect will look like this after adding Outer Glow.
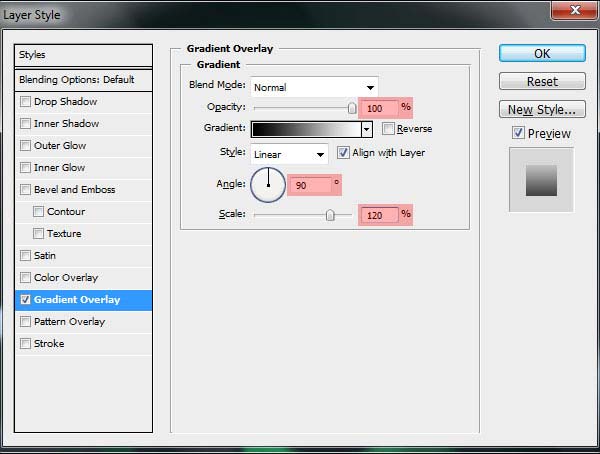
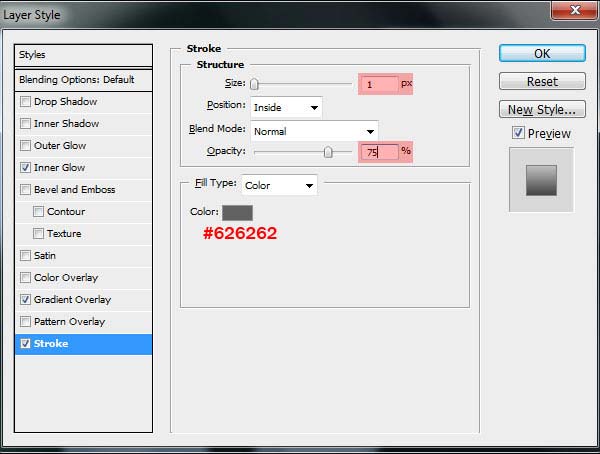
Lets add styles to the Glow, double click on the glow text layer to access the layer style and add Gradient Overlay, Inner Glow and Stroke as shown.
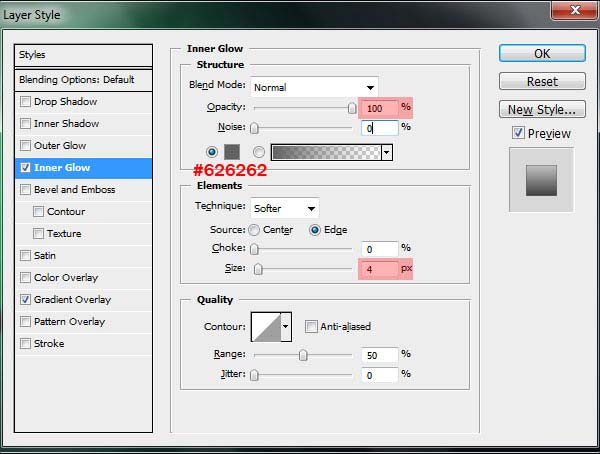
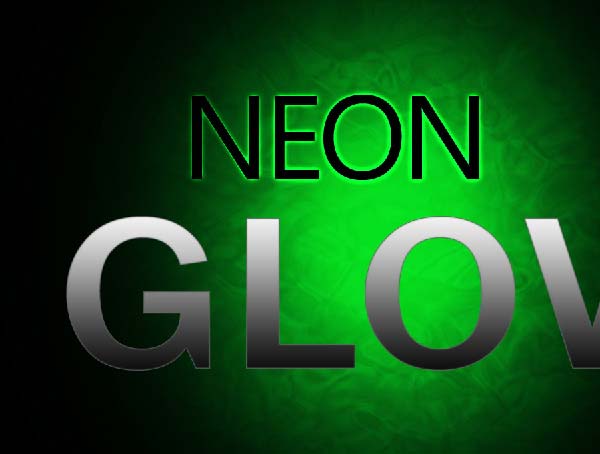
The effect will look like this after adding above styles.
STEP-4 (Creating 3D effect )
Lets start to create 3D effect to the GLOW text. Duplicate the glow text layer and remove all layer styles, fill with (#101010 )color of it then move a bit top left I as shown.
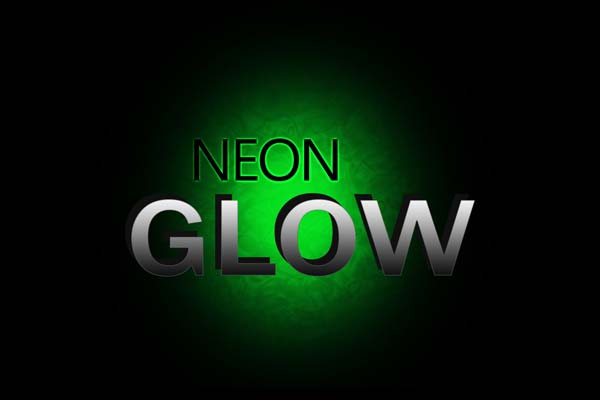
Take a new layer using
Pen Tool(P) make connections and fill with same color(#101010)
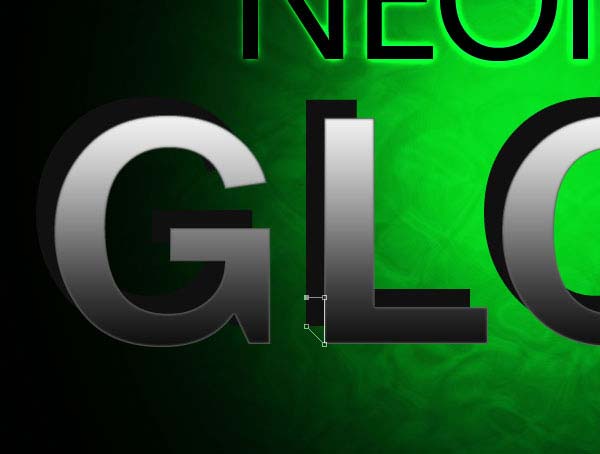
Make the connections to the below showed areas.
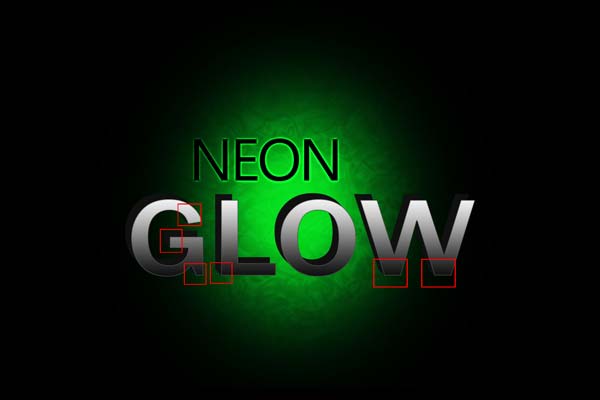
Using same method make the connections to create top surface and fill it with (#252525) dark gray color and merge the these three layers.
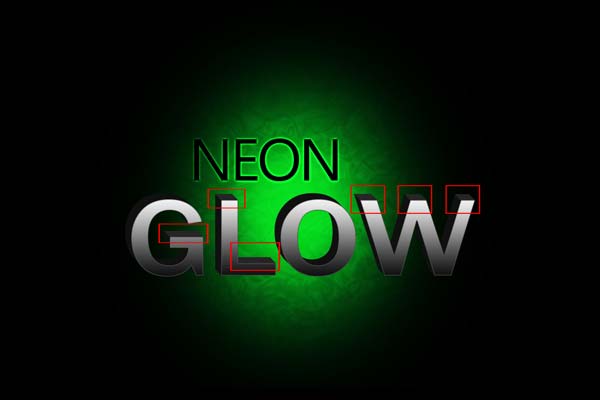
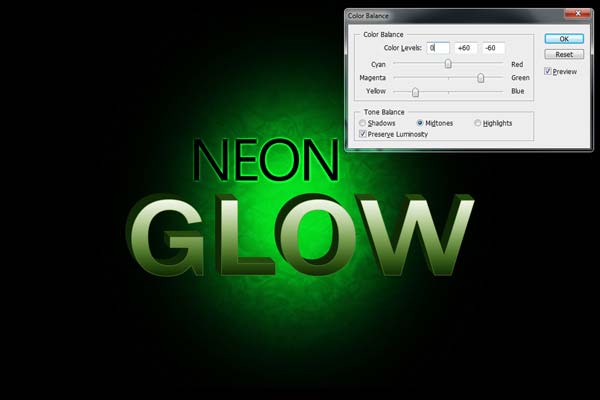
lets change the color of the text using Color Balance(Ctrl +B) give values (0, +60, –60) as shown.
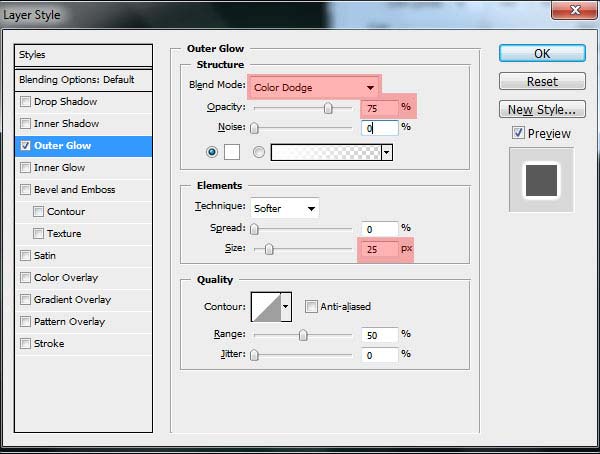
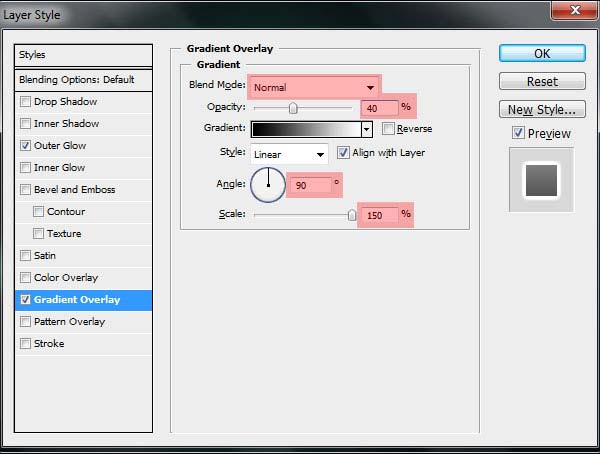
Then double click the Glow text layer to access the layer style and add below styles.
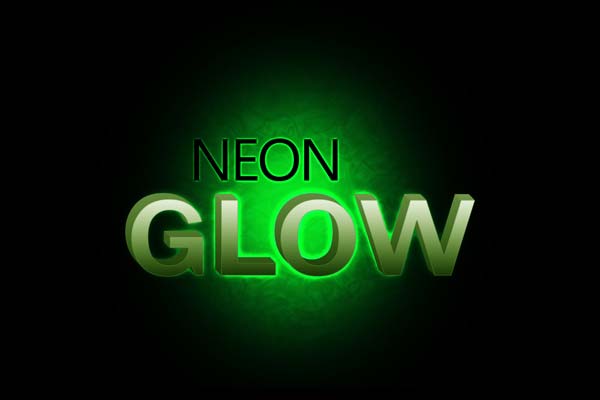
The effect will look like this after adding above styles.
STEP-5 (Creating lighting curves)
In this step we will give beautiful effect to the text by adding lighting curves and sparkles. To do this in a new layer using
Pen Tool (P) draw curved line as I shown.
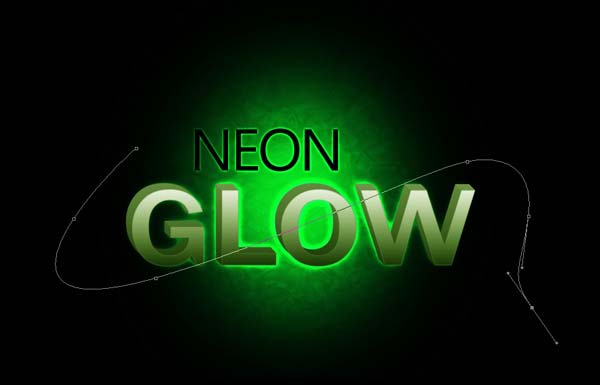
After creating the curves right click on curve line, select
Stroke path, select
Brush and click Ok. Select
Soft Round 4-5 pixel brush (B) with Green color(#3dfc65). and hit F5 to see
Other Dynamics of
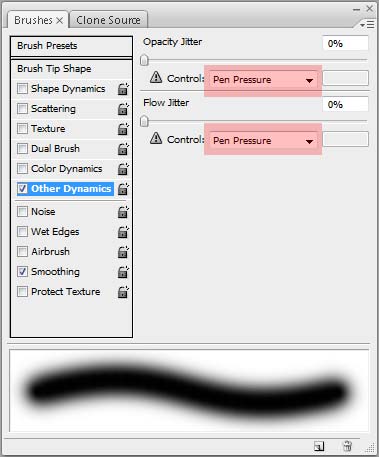
Brushes and follow setting as shown below
The Brush strokes will look like this
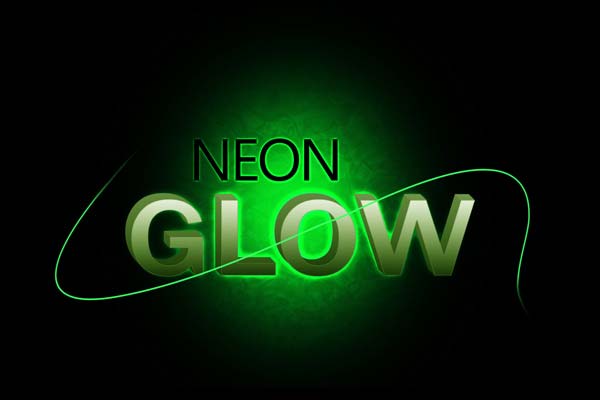
Now duplicate the layer and scale it a bit small
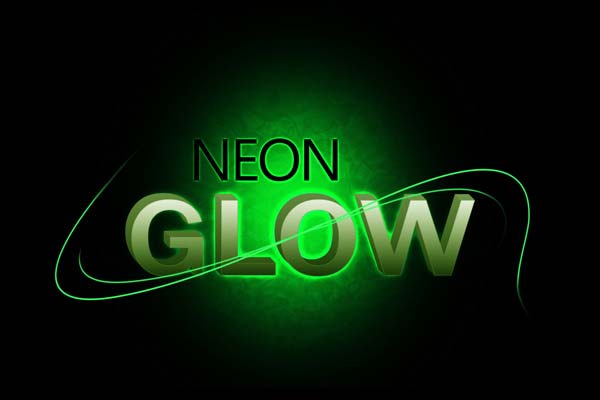
Then double click on curved line layers to access the layer style and give
Outer Glow as shown below.

The effect will look like this.
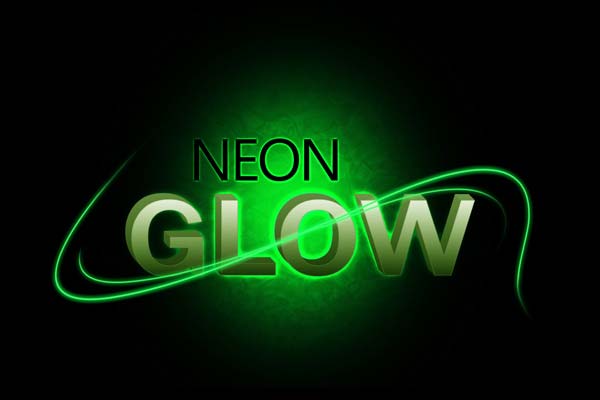
Using
Eraser Tool(E) erase lines at below showed areas.
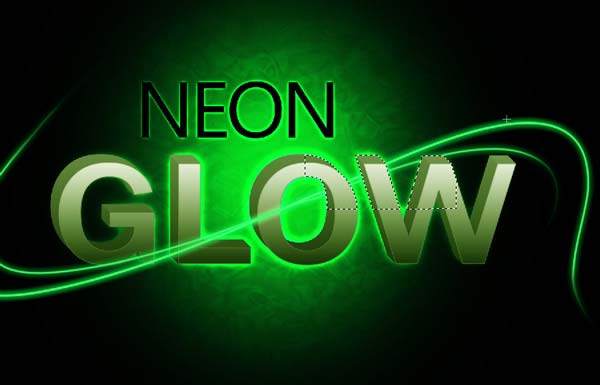
STEP-6 (Add sparkles on lines)
At the final stage I have decided to finish by adding some sparkles on the curved lines, for that take default
Soft Round Brush(B) and make settings as shown.
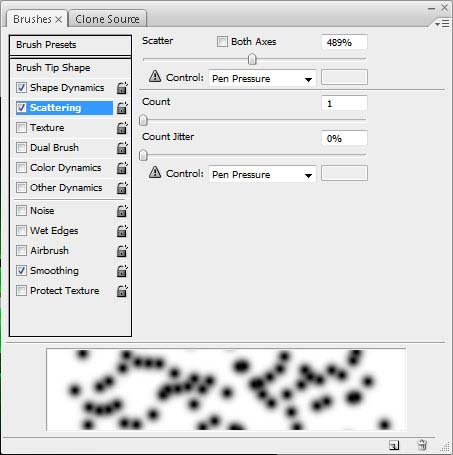
Create sparkles on lines using this brush and Green color(# 1eb43e). Use small brush to add sparkles at the start and end points of lines.

You can add Outer Glow to the sparkles as we given to lines in the above step, so that they looks more effectively. Here is how our final effect looks.
Final Effect: 
Hope you enjoyed by reading this tutorial, lets have a try. Thank you!
Download

 Then duplicate the layer and change the layer mode to Color Dodge. This will make your light ball a stronger light effect as shown.
  Take a new layer, Set the background color to White (# ffffff) Foreground color to Black (# 000000) and make selection around the ball shape by holding Ctrl button click on layers thumbnails. Then create cloud effect go to Filter > Render > Clouds.
  Change the layer mode to Overlay and change the Opacity to 35%. Now go to Filter > Sketch > Chrome, change the settings (Detail 10 & Smoothness 10) as shown below and press OK.
  The effect will look like this after adding Chrome.
 Then double click on NEON Text layer to access the layer style and give Outer Glow as shown below.
  The effect will look like this after adding Outer Glow.
  Lets add styles to the Glow, double click on the glow text layer to access the layer style and add Gradient Overlay, Inner Glow and Stroke as shown.

 The effect will look like this after adding above styles.
 Take a new layer using Pen Tool(P) make connections and fill with same color(#101010)
  Make the connections to the below showed areas.
  Using same method make the connections to create top surface and fill it with (#252525) dark gray color and merge the these three layers.
  lets change the color of the text using Color Balance(Ctrl +B) give values (0, +60, –60) as shown.
  Then double click the Glow text layer to access the layer style and add below styles.
 The effect will look like this after adding above styles.
 After creating the curves right click on curve line, select Stroke path, select Brush and click Ok. Select Soft Round 4-5 pixel brush (B) with Green color(#3dfc65). and hit F5 to see Other Dynamics of Brushes and follow setting as shown below
  The Brush strokes will look like this
  Now duplicate the layer and scale it a bit small
  Then double click on curved line layers to access the layer style and give Outer Glow as shown below.
  The effect will look like this.
  Using Eraser Tool(E) erase lines at below showed areas.
 Create sparkles on lines using this brush and Green color(# 1eb43e). Use small brush to add sparkles at the start and end points of lines.
  You can add Outer Glow to the sparkles as we given to lines in the above step, so that they looks more effectively. Here is how our final effect looks. Final Effect:
  Hope you enjoyed by reading this tutorial, lets have a try. Thank you! Download